Step-by-Step Tutorial for Setting Up a Flex Plan

Do you want a truly flexible flex plan? Want it to be hands-free for you? Here's how to set it up on Spinzo
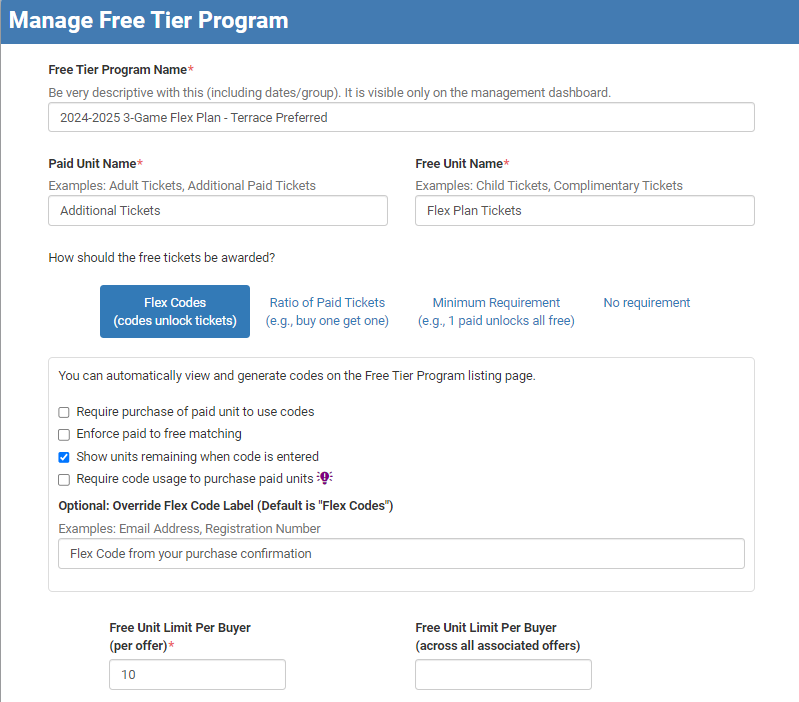
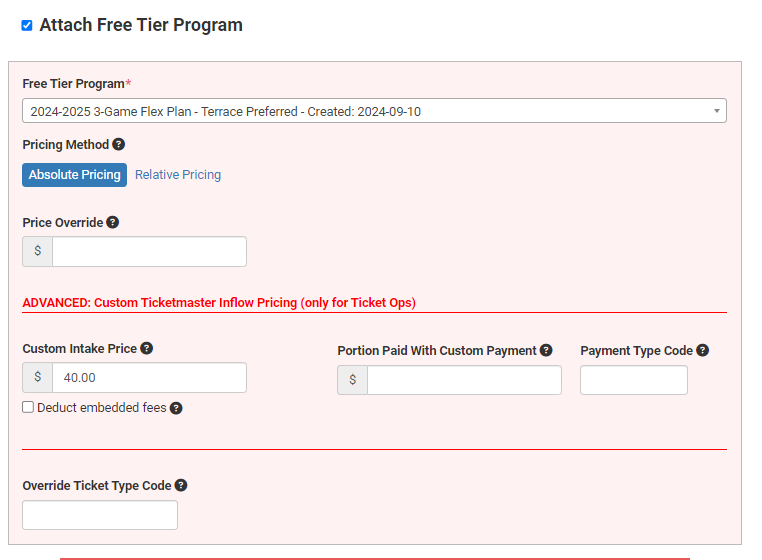
1. Create the Free Tier Program:
- Go to the “Free Tier Program” section.
- Name your program (e.g., “2024-2025 Three-Game Flex Plan - Terrace Preferred”).
- Select “Flex Codes” as the free ticket award type.
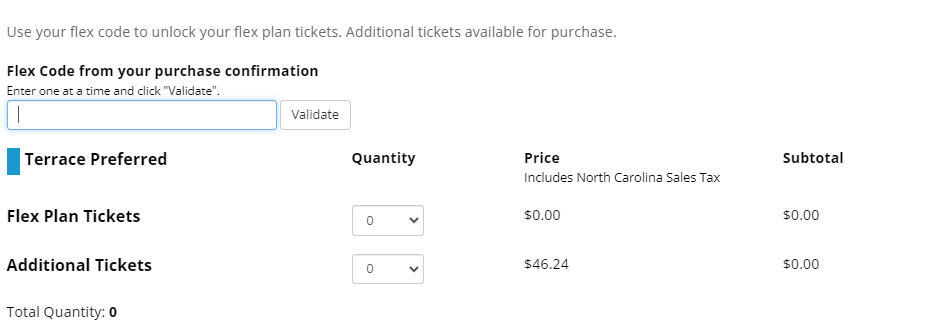
- In buyer-facing instructions, tell them to use the flex code from their flex plan confirmation email.
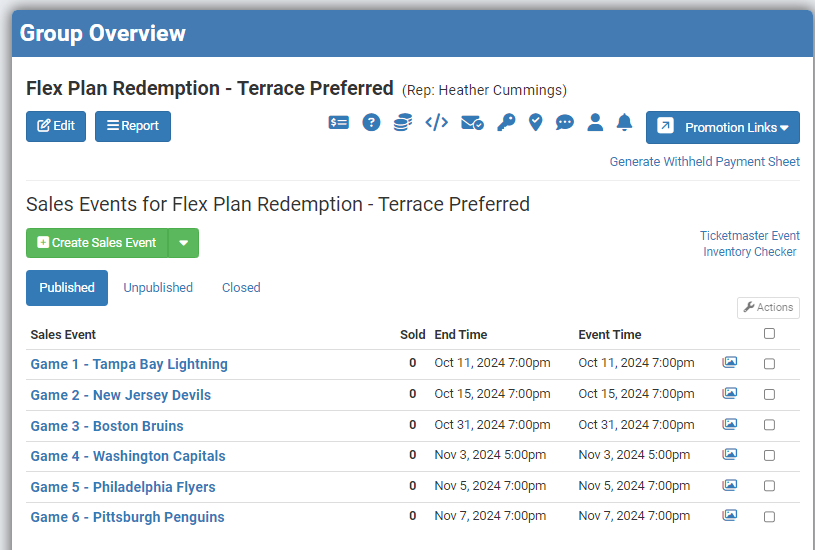
2. Set Up the Redemption Group:
- Go to “Groups” and create a new Redemption Group.
- Name it based on the seating zone (e.g., “Terrace Preferred Redemption”).
- Save the group and obtain the promotion link for the group.
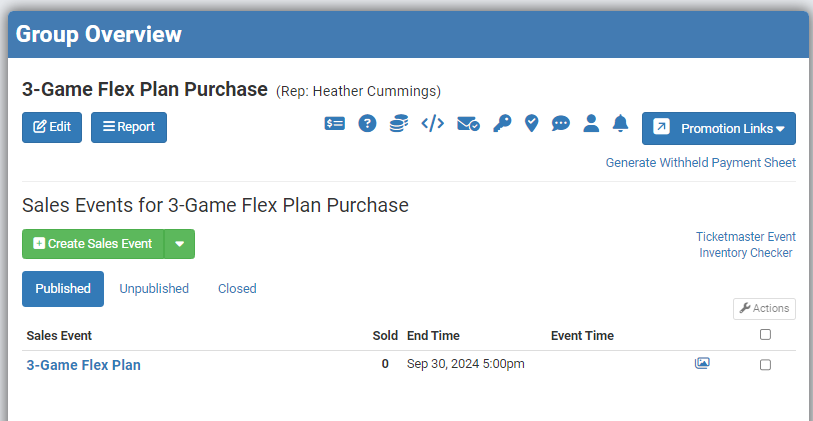
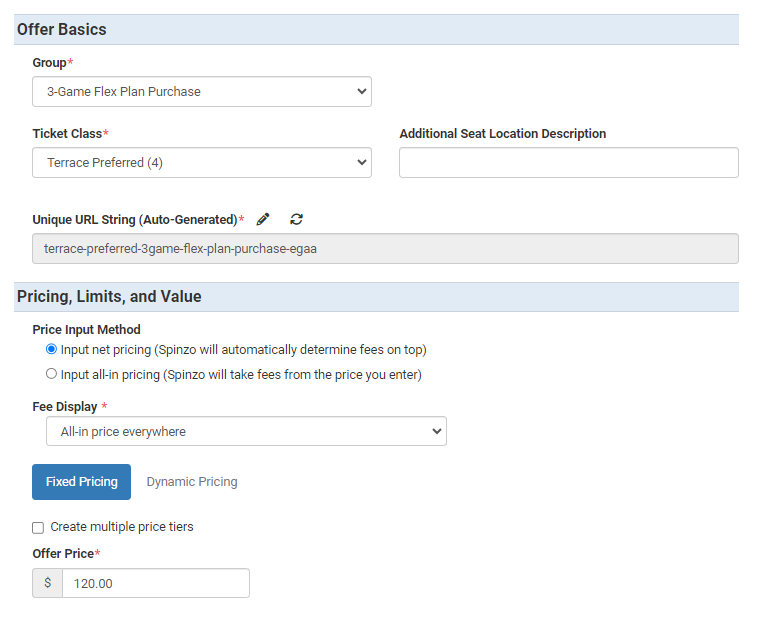
3. Build the Purchase Group:
- Create a new group for the purchase of the flex plan. You can have one group for the whole plan, even across multiple seating zones.
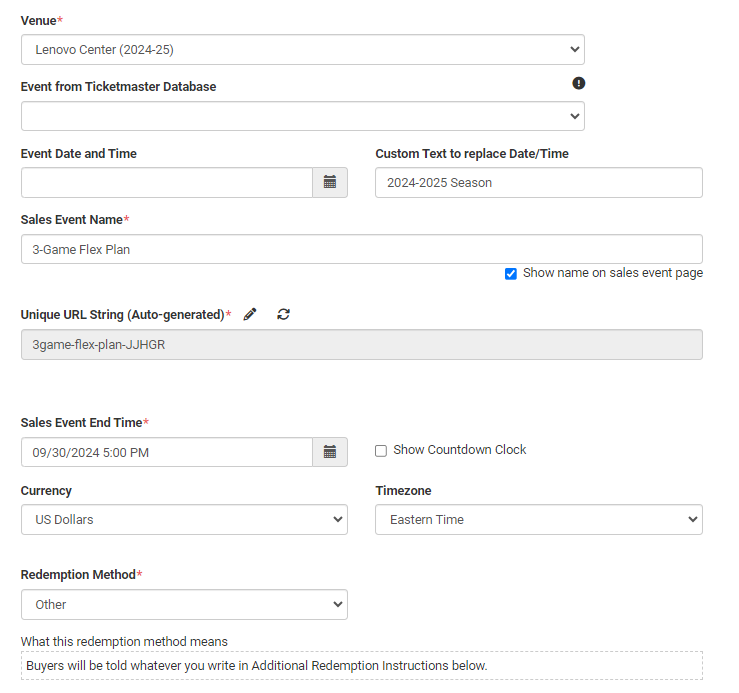
- Create a sales event with a custom name like "3-Game Flex Plan"
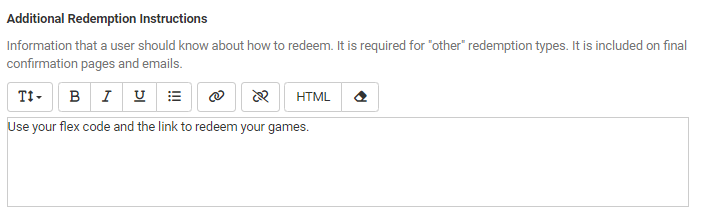
- Under “Redemption Method,” select “Other” and add instructions for using the flex code and redemption link.
4. Link Free Tier and Redemption Group:
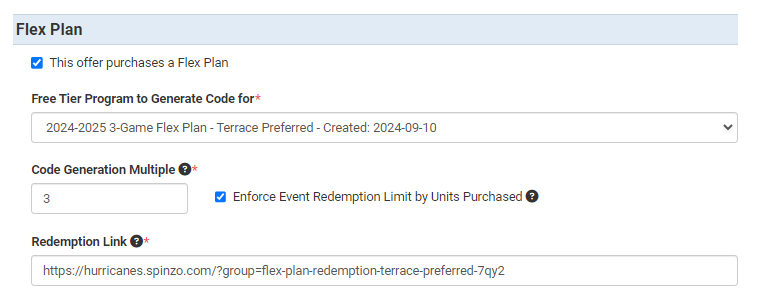
- When you build an offer in the sales event (for a seating zone), choose the free tier program you created.
- Set the number of units per code (e.g., 3 for a three-game plan).
- Specify whether buyers can use all units at once or must spread them over multiple games.
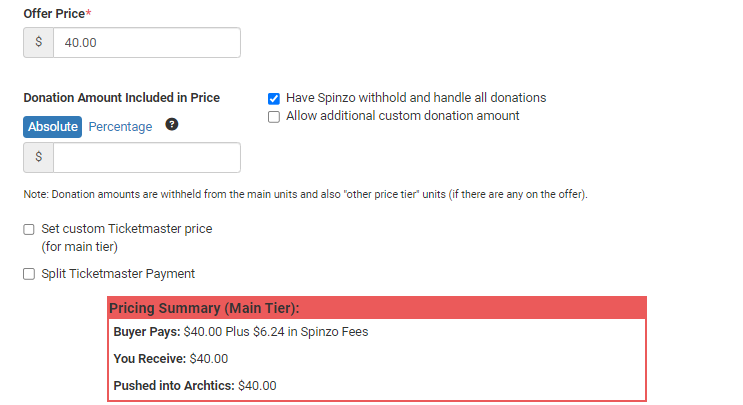
5. Configure Redemption Offers:
- Go back to the Redemption Group.
- Add games eligible for the redemption offer.
- Set additional ticket prices and assign the free tier program.
6. Test and Publish:
- Preview the buyer experience, including the confirmation email and redemption process.
- Publish the offer and test the redemption link.
This process allows buyers to redeem tickets as they choose throughout the season while maintaining control over ticket allocations and sales.