
Building a Basic Promotion: Step-by-Step Guide
The building of every Spinzo promotion follows the same core process: create a group, add a sales event, build your offers, and publish the page. The guide below walks through each step of that process to help you quickly build and launch a basic promotion.
Step-by-Step Guide
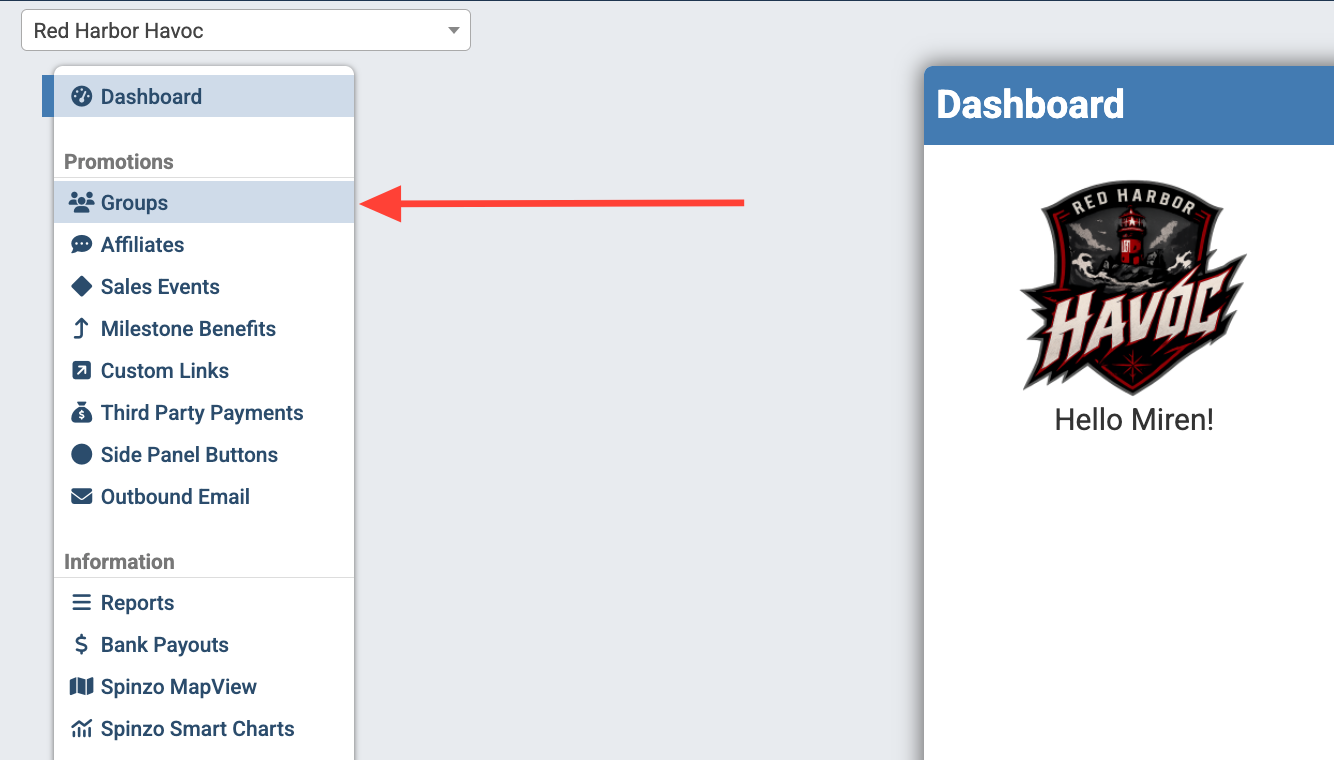
Step 1: Locate the "Group" tab on the left-side menu. It is located under the "Promotions" section near the top of the menu, directly below the "Dashboard" tab.
*Note: The next several steps involve following the green buttons through the platform.
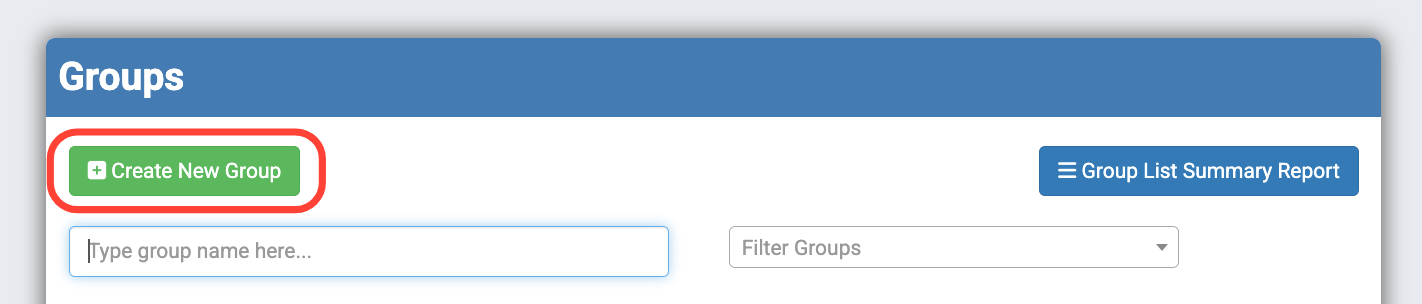
Step 2: Search for an existing group or click the green "Create New Group" button. *Note: Spinzo recommends reusing the same groups year-over-year. If a group does not already exist, create a new one.
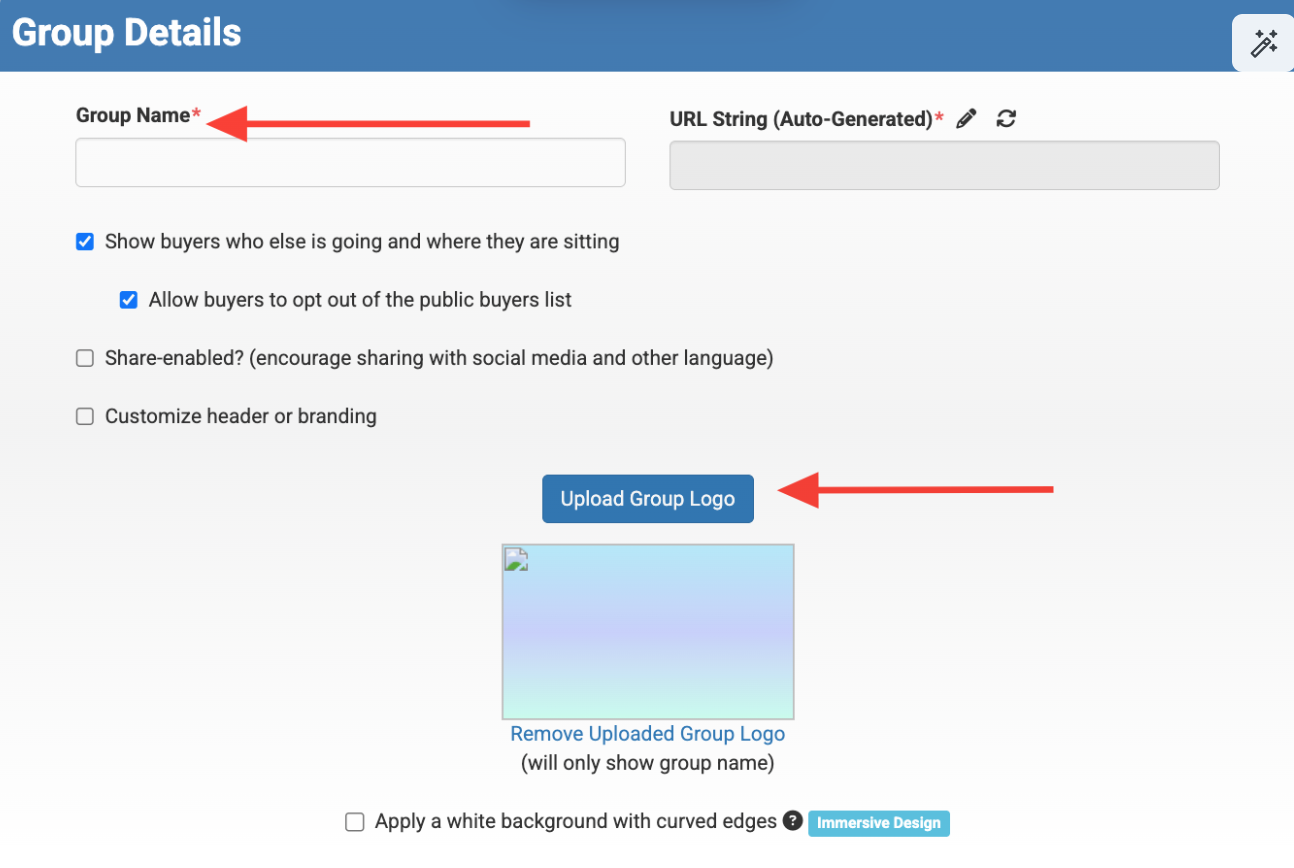
Step 3: Enter a name in the "Group Name" field. This name should not include a year. Instead, use a generic name such as "ABC Dance Company" or "Youth Sports Team." For larger promotions that use multiple groups, consider broader names such as "Corporate Partners" or "Standard Group."
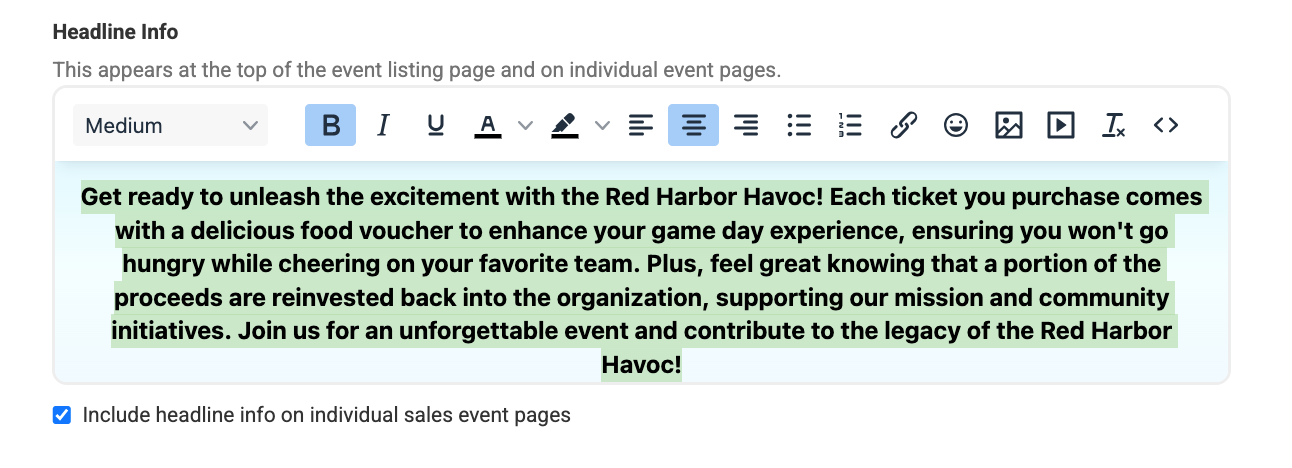
*Optional: Add a group logo or disable "Show Buyers Who Else is Going and Where They Are Sitting." You can also scroll to the "Headline Info" section to add the information buyers will see on the promotional page.
Step 4: Click the green "Save" button.

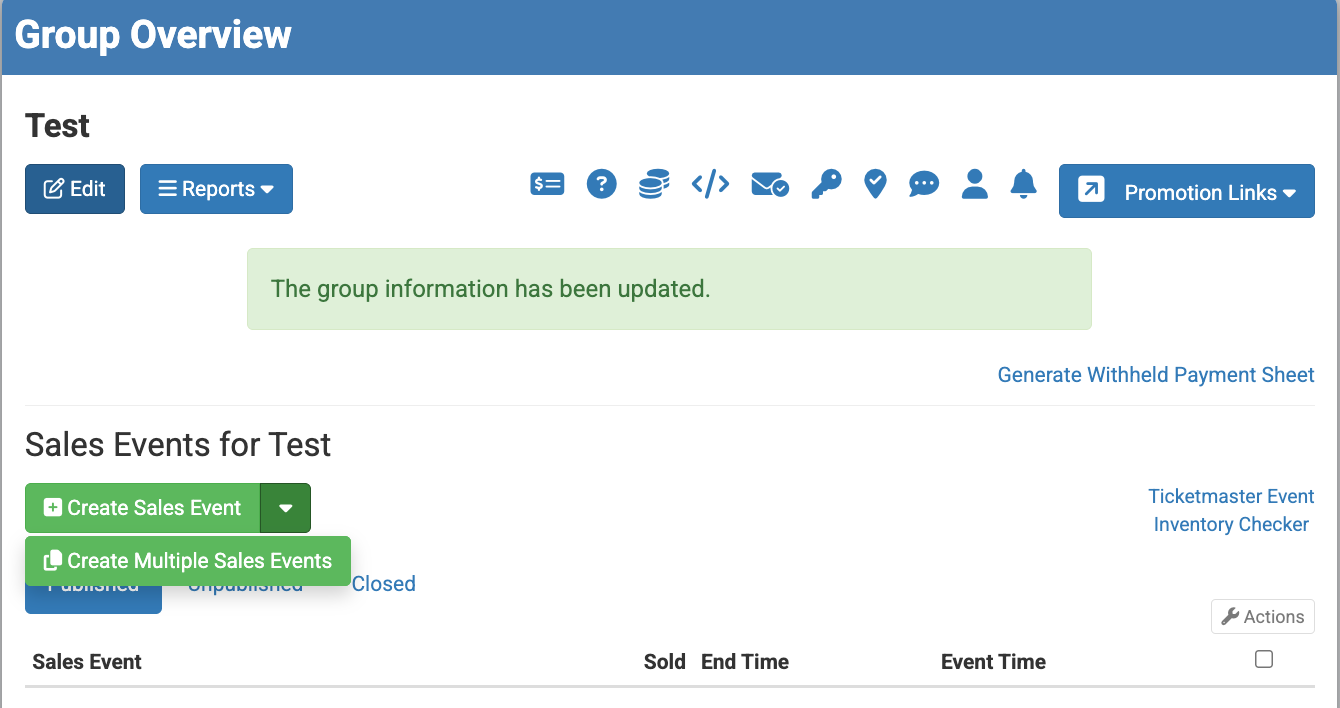
Step 5: Click the green "Create Sales Event" or "Create Multiple Sales Events" button.
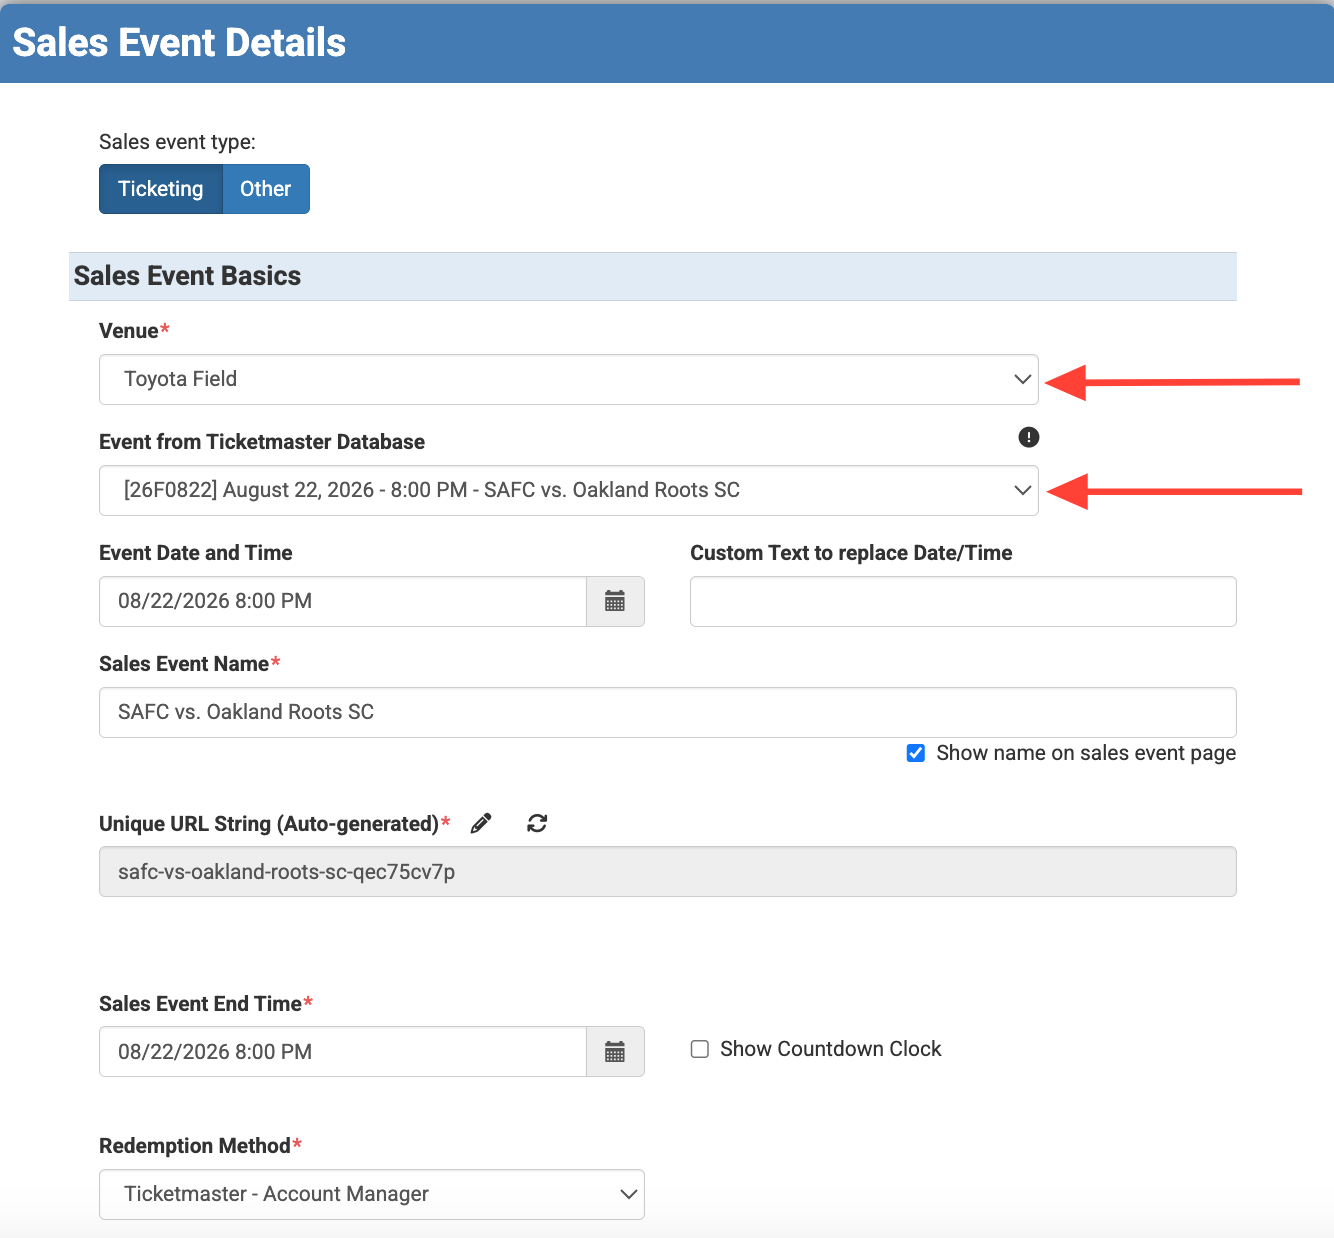
Step 6: Select the "Venue" from the drop-down menu, then select the "Event from Ticketmaster Database." This will automatically populate most of the required information for the page.
Step 7: Click the green "Save" button.
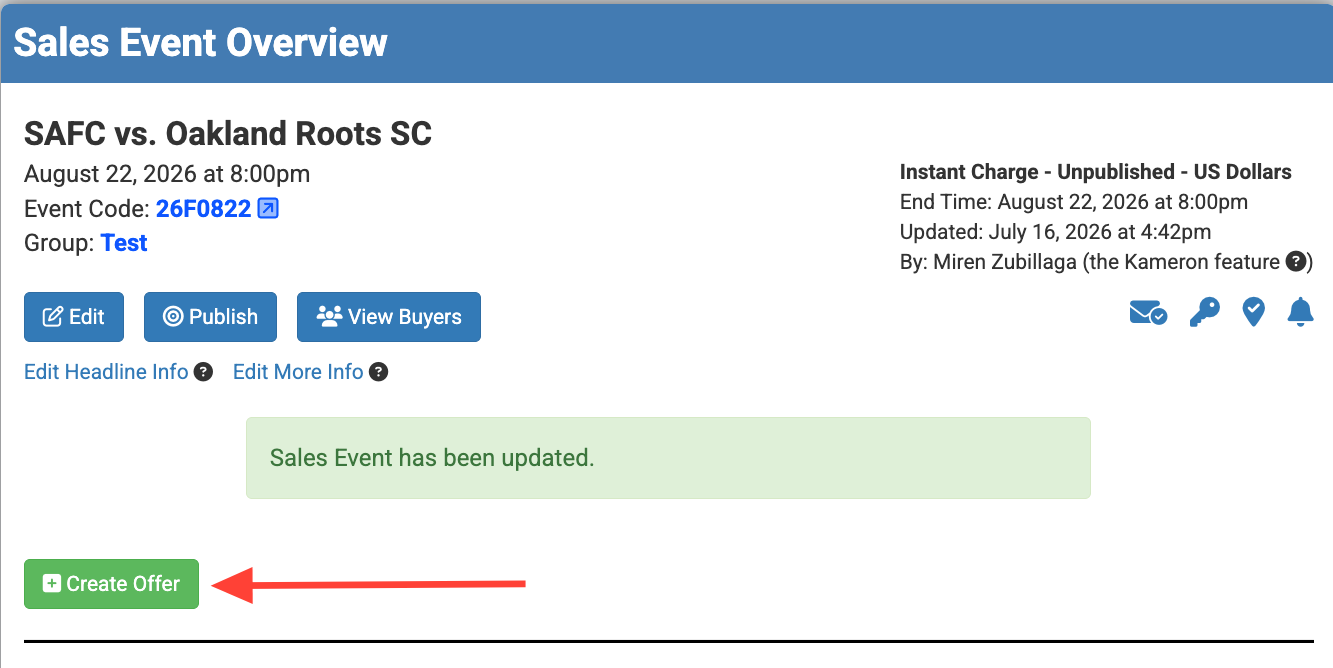
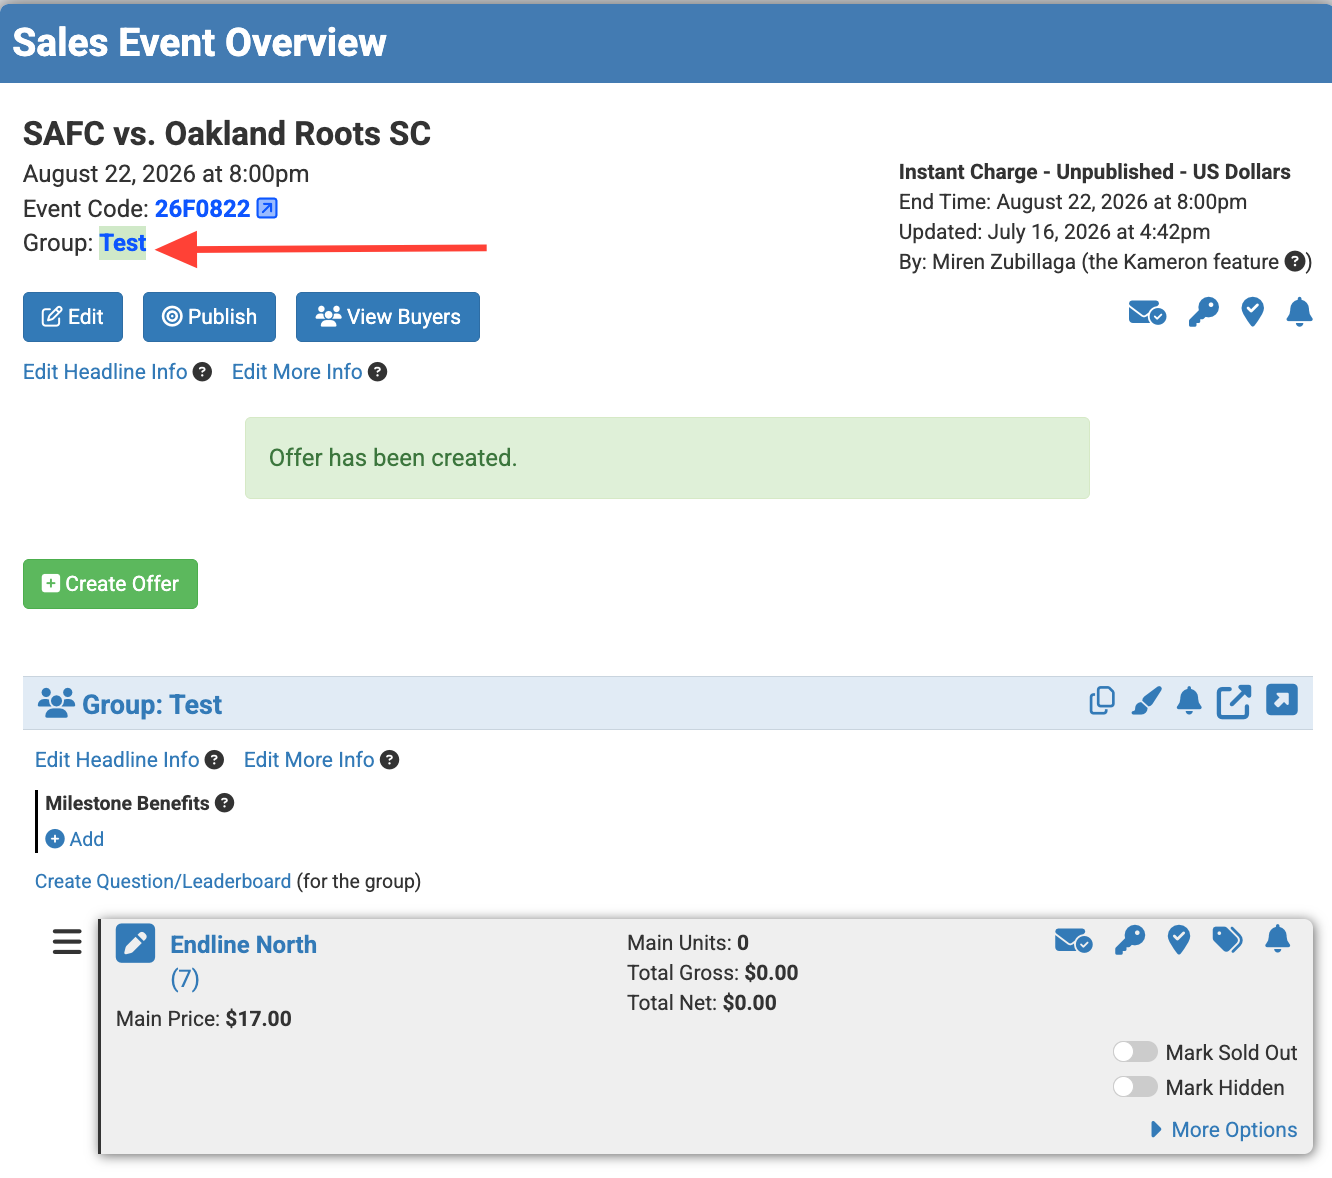
Step 8: Click the green "Create Offer" button to add your seating zones and price levels.
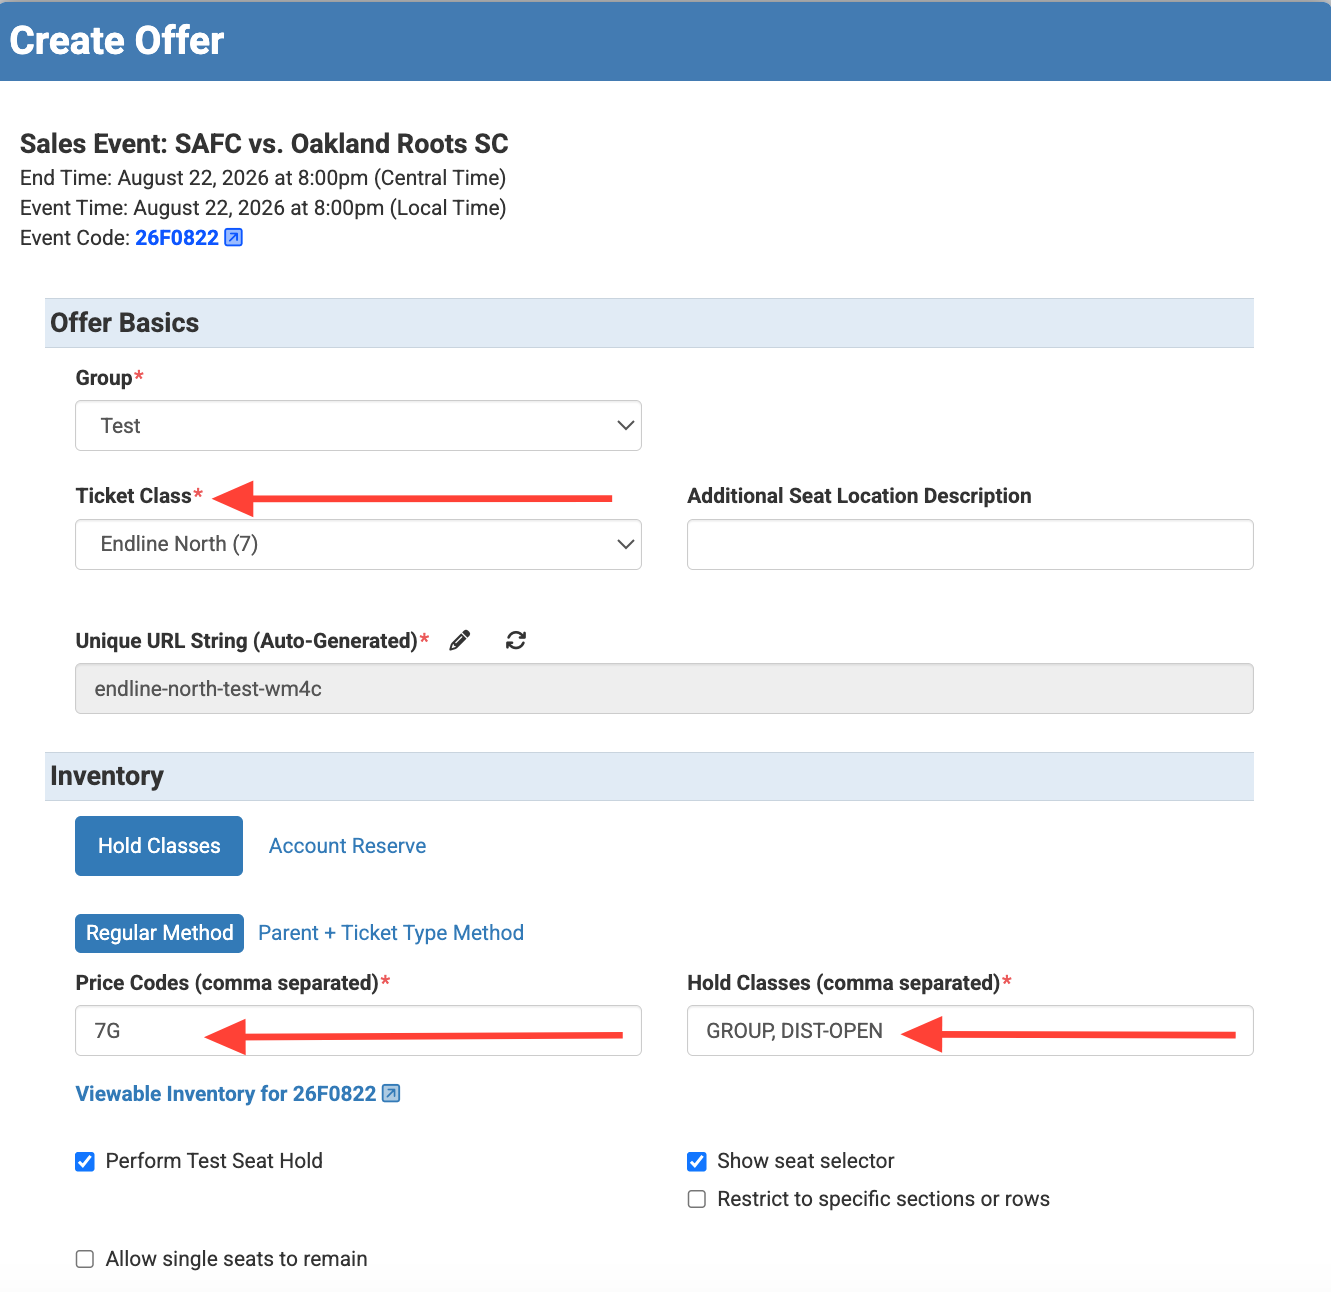
Step 9: Select the "Ticket Class" from the drop-down, then add the appropriate "Price Code(s)" and "Hold Class." *Note: Multiple price codes and hold classes can be used as long as the price remains the same across each selected price code and hold class.
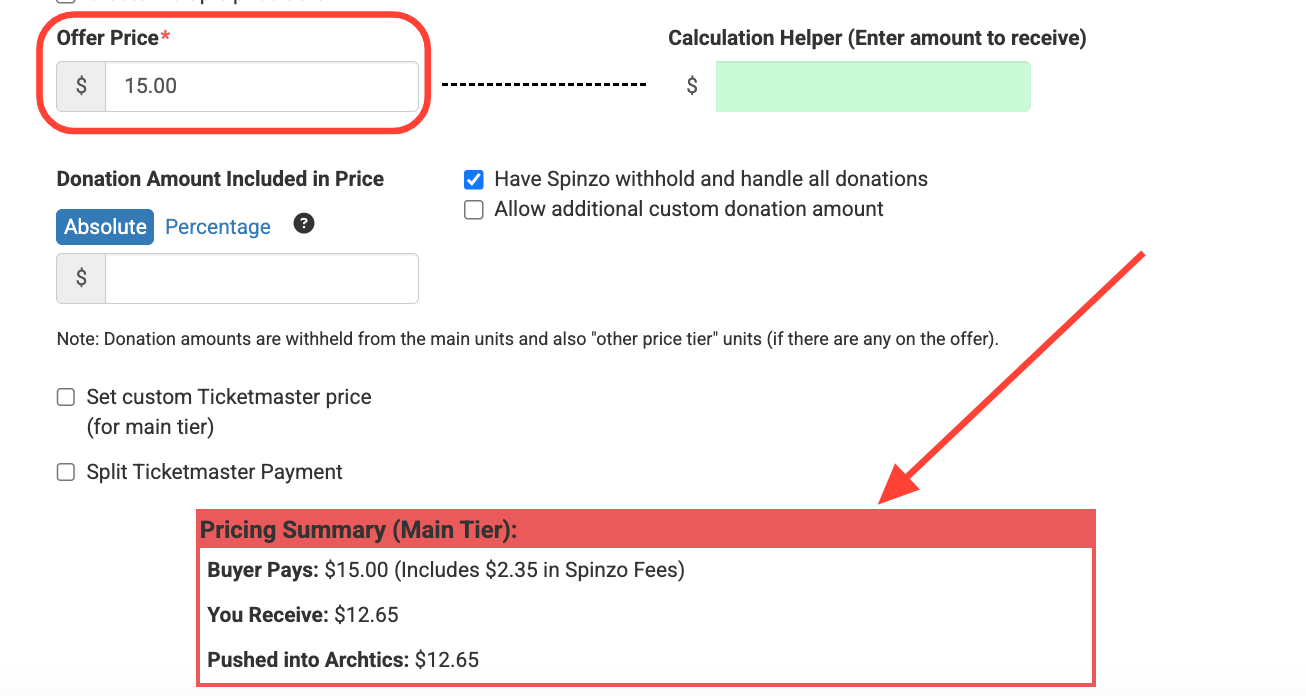
Step 10: Scroll down and add the "Offer Price" which is the price the buyer will pay. It is located under "Price, Limits, and Value." Review the red "Pricing summary (Main Tier)" box to confirm the pricing is correct.
Step 11: Click the green "Save" button.
Step 12: Repeat Steps 8-11 for any additional seating zones.
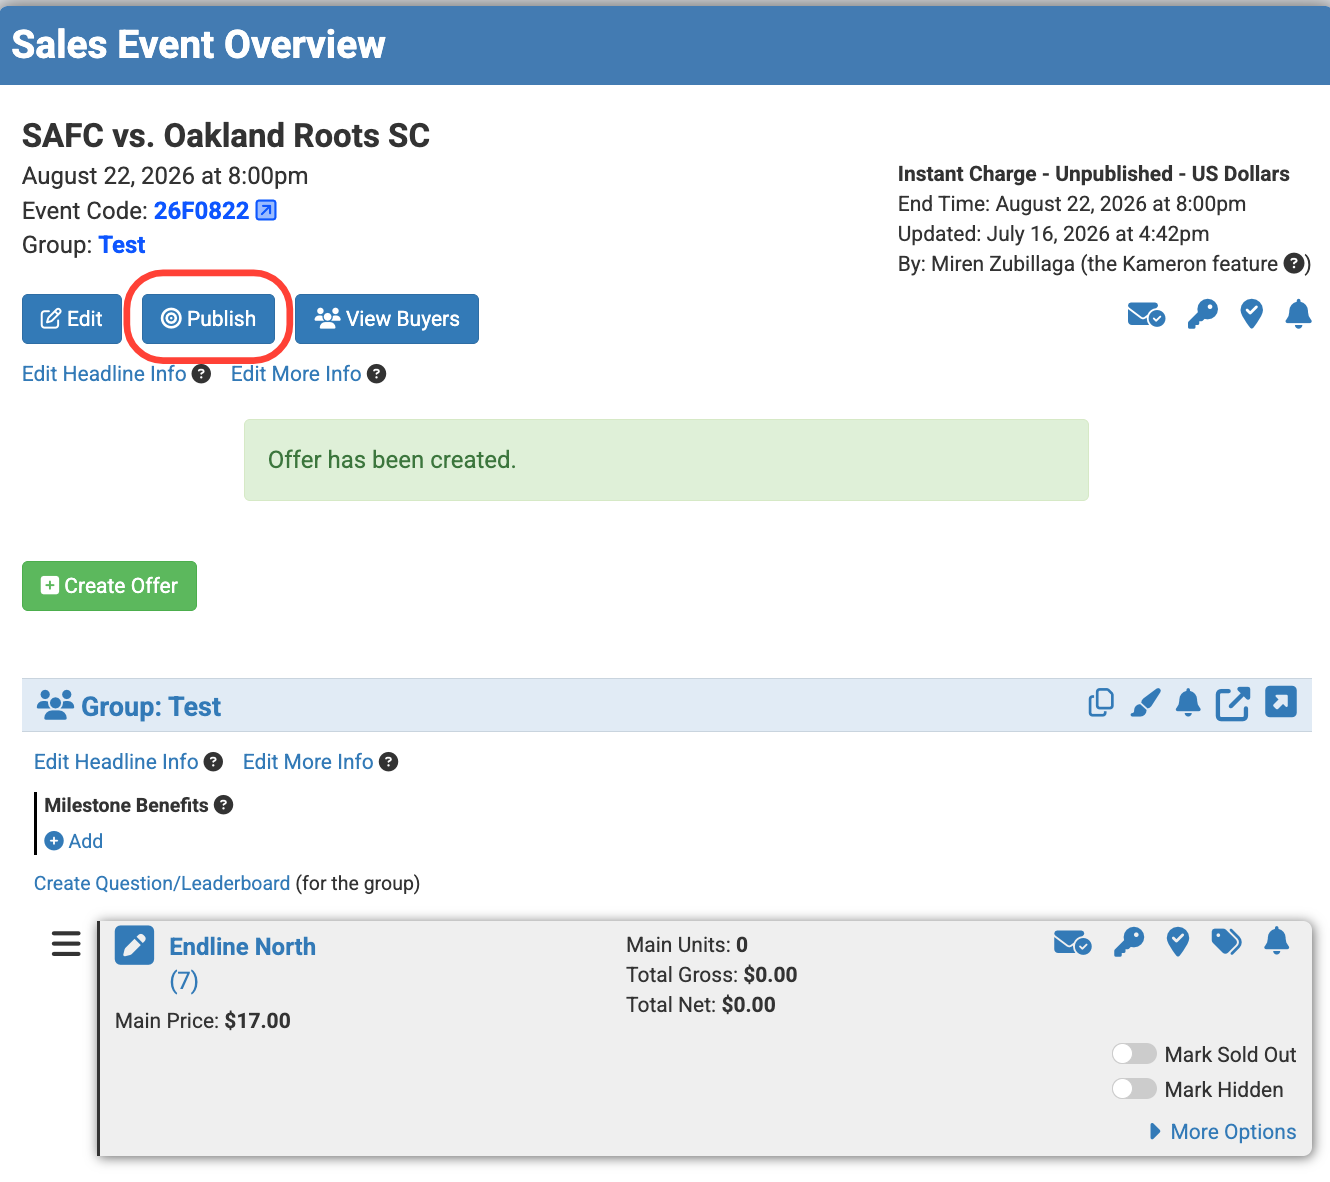
Step 13: If everything looks correct, click "Publish."
Step 14: Navigate to the live promotional page.
*Sales Event Link: Click "Link to Offers" to get to the sales event page.
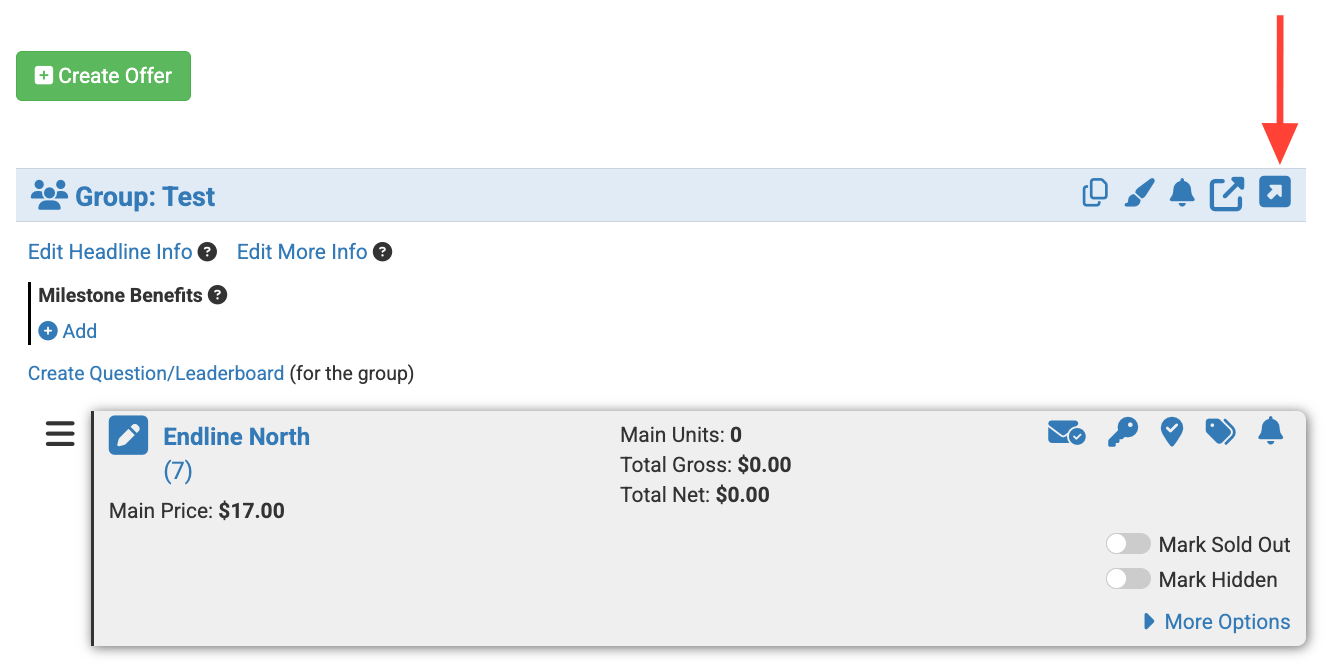
*Group Link (Used most often when their are multiple games within a promotion): Click the blue group name at the top of the page. Then select the blue "Promotions Link" button in the upper-right corner and choose "Published Offers" to get the group link.
Your basic Spinzo promotion is now complete. From here, you can further customize your page by adding branding, images, descriptions, custom messaging, and additional offers as needed before sharing your promotional link with buyers.